There’s been a few times that I’ve wanted to turn a number of stills photos into a Quicktime movie. Sometimes it’s for time-lapse or to just present a sequence of stills as a video, like we did for the Making Things Happen promo video. So, this quick how-to is as much a reminder for myself for the next time I want to do this, as for anyone else.
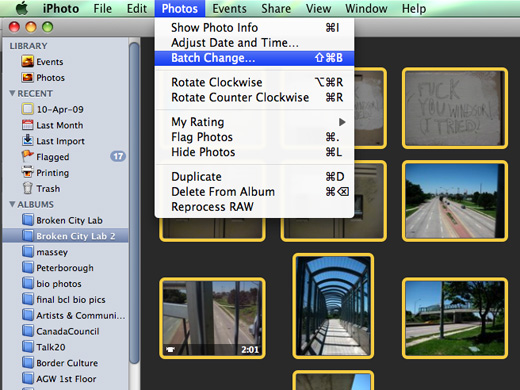
The first step as you can see above is to create an album containing all the photos you want to turn into a video, select all the photos in the album, then choose Batch Change from the Photos menu.
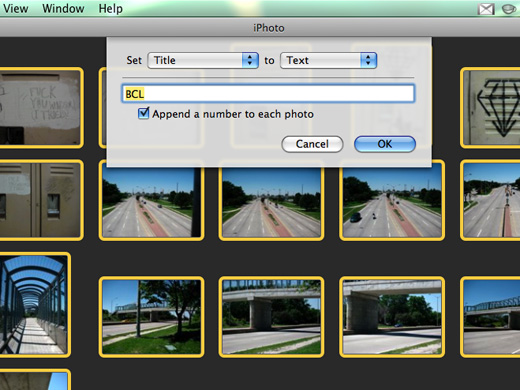
The next menu that comes up will ask what you want to batch change. Select Title from the Set drop-down menu, ensure you change the to field to Text and check the Append a number to each photo checkbox (this is crucial, because without the leading zeroes, the files wouldn’t be ordered correctly when you bring them into Automator). I just added the text, BCL to the title.
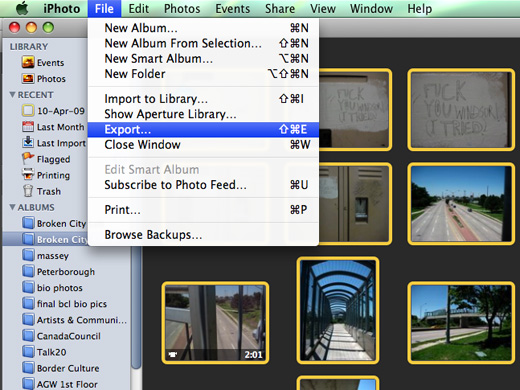
Next, you want to Export all the photos with the new titles.
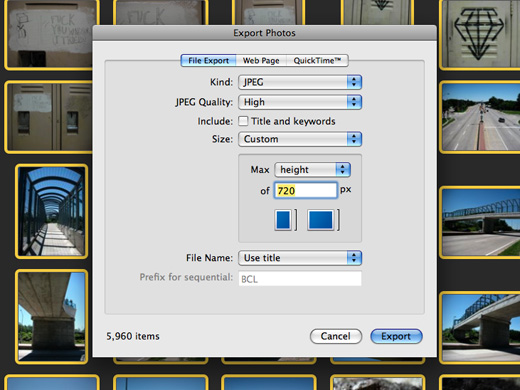
I chose a maximum heigh of 720px so these photos came out around HD 4:3 resolution, 960 x 720. Depending on how many photos you have in your album, this might take a while. I had almost 6000 photos, so this part took maybe 10-15 minutes.
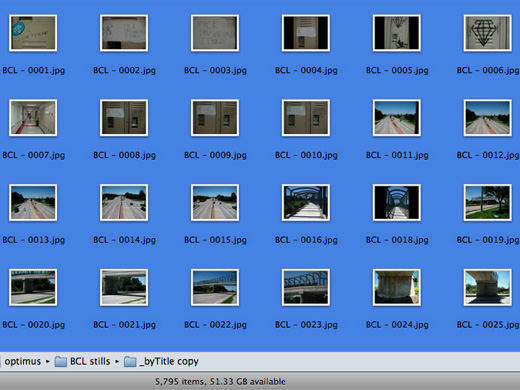
The resulting photos are neatly named with the crucial 4 digit numbers (with leading zeroes where appropriate).
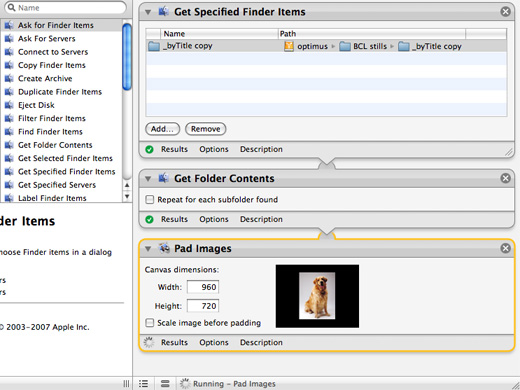
Next, because some of the photos were portrait, instead of landscape, I wanted to pad the images to ensure each one was 960 x 720 px. I used Automator to create a simple workflow that grabs the folder, uses the folder contents, and then pads the images.
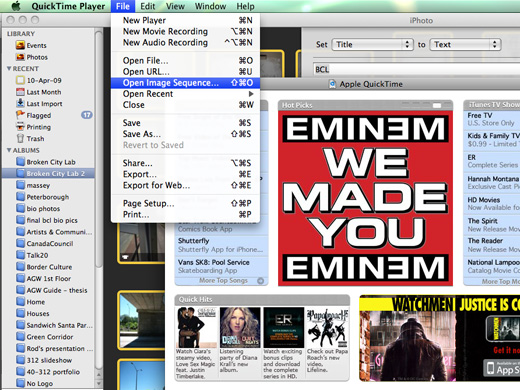
All the images will now be ordered and ready to go for Quicktime. In Quicktime (I think you might have to have Quicktime Pro for this), you want to Open Image Sequence and navigate to the appropriate folder.
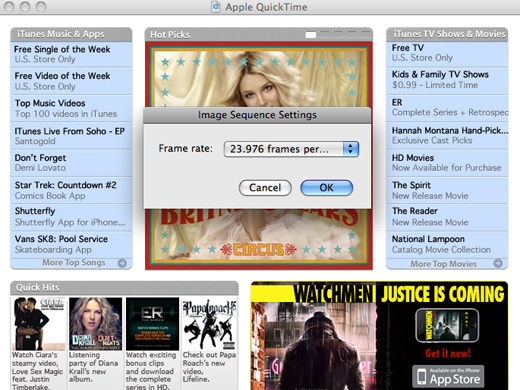
Upon import, you want to set the frame rate. You might need to try importing a few times (the frame rate you choose will essentially make the video play slower or faster). After you choose OK from this menu, wait a few minutes and the time-lapse video will be rendered waiting for you to save it.
That’s it. There’s a lot of different ways of doing this, but given that just about everyone probably has iPhoto, Automator, and Quicktime, I thought this would be the most helpful.
Nice — thanks Justin!!
Where do we have to export the images to?
Automator?
You just need to export the files to a new folder. You will then select that folder in Automator using ‘Get Specific Finder Items.’
Thanks a ton!
I too have macBook and its of great help…. :)