Cardstock Handwriting Stencils from our Vinyl Cutter (test phase)

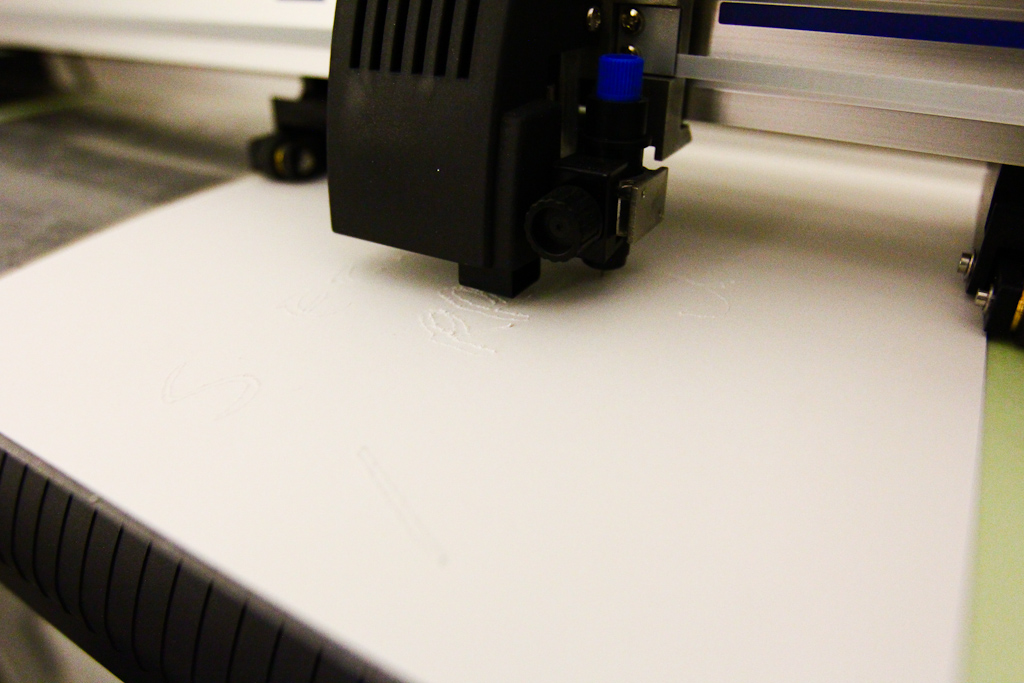
We’ll be picking up on this again today as we continue to experiment with cutting stencils of our handwriting on cardstock from our vinyl cutter, the Graphtec ce5000-60. These are very early tests, but will hopefully lay the groundwork for some processes and projects later on in the summer or fall.

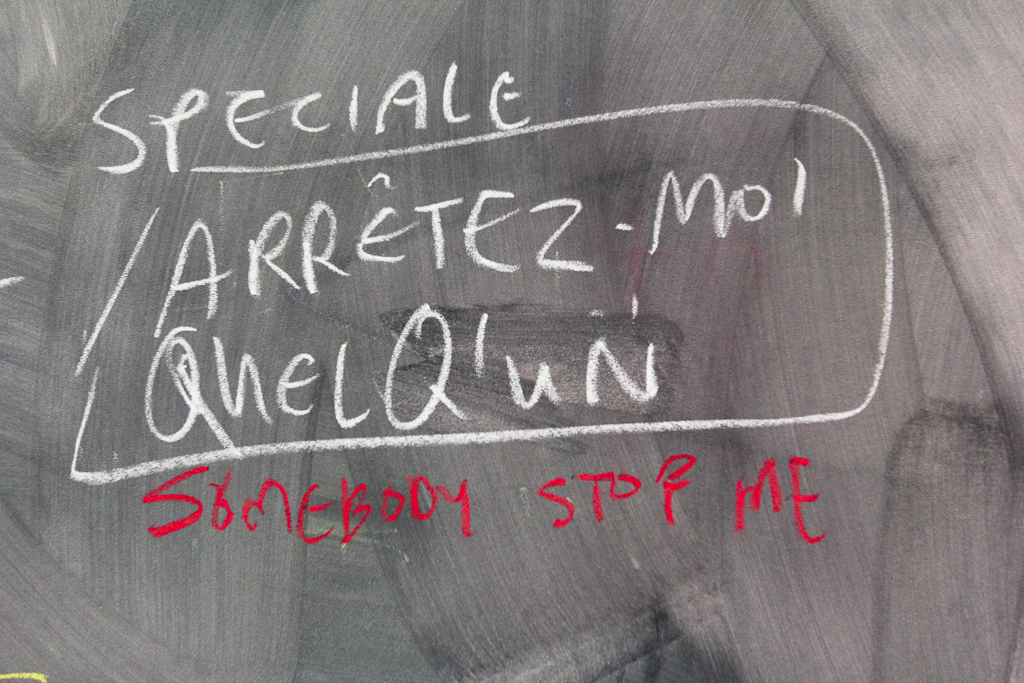
No big surprise, trying to convert writing on a chalkboard to a stencil produces a really challenging job for the cutter. The grain of the chalk was interesting to work into an outline / live trace in Illustrator. Also, Sara has nice handwriting.

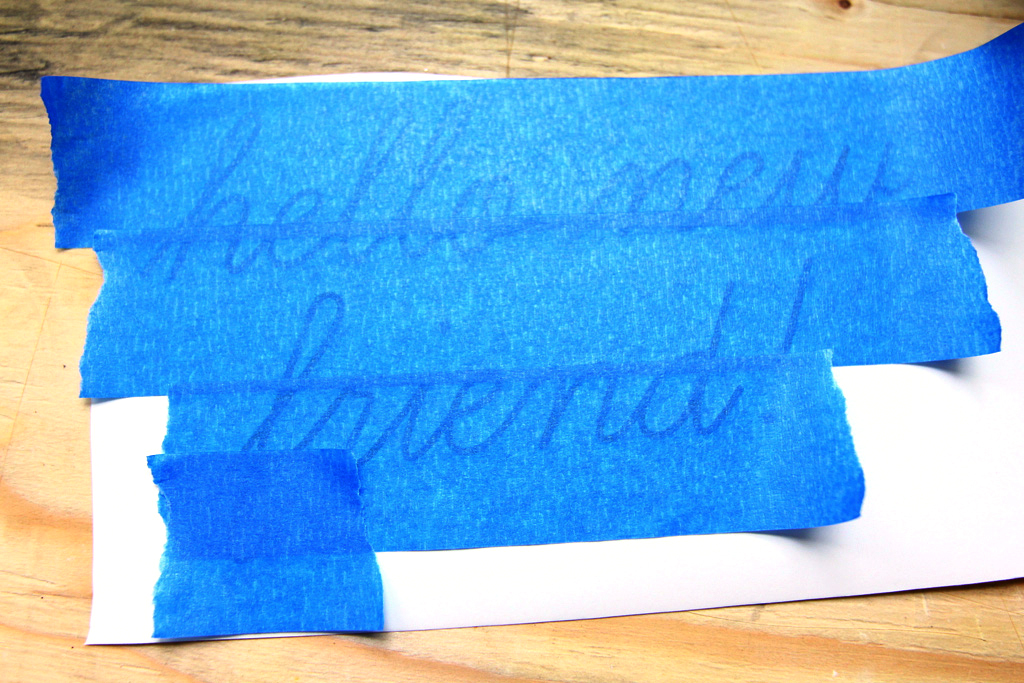
Hiba’s handwriting worked a lot better on paper. We’ll almost certainly work from this as a starting point as we continue researching this.

But beyond handwriting, we’re also looking at a kind of automated process to turn photos into stencils — so the tests in cutting these kinds of very delicate edges have been worthwhile.

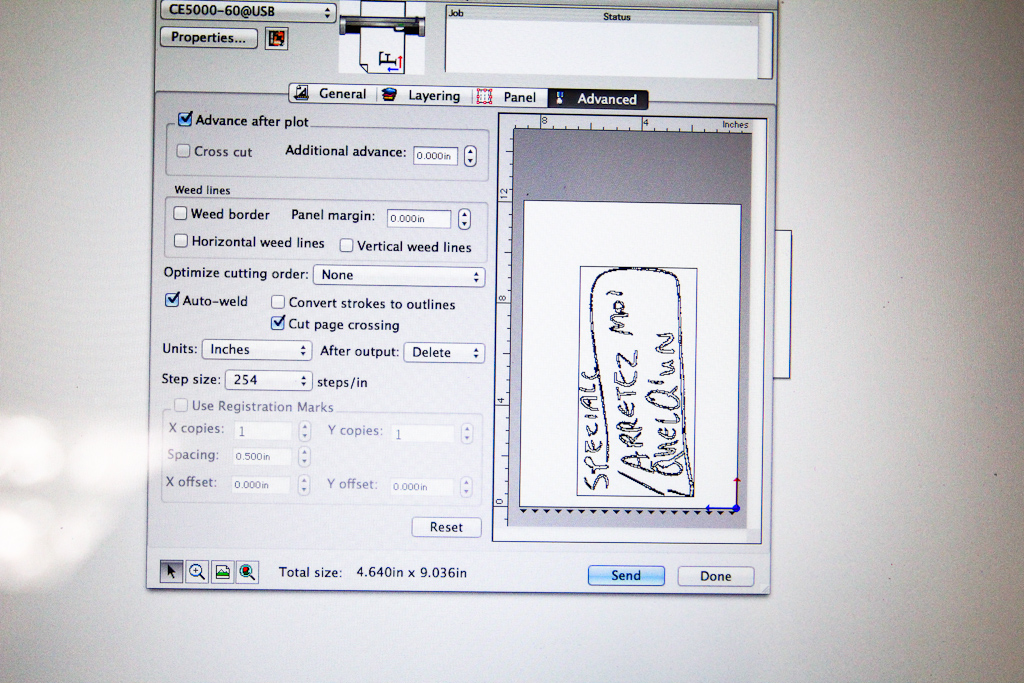
Above the cutting interface through Illustrator.

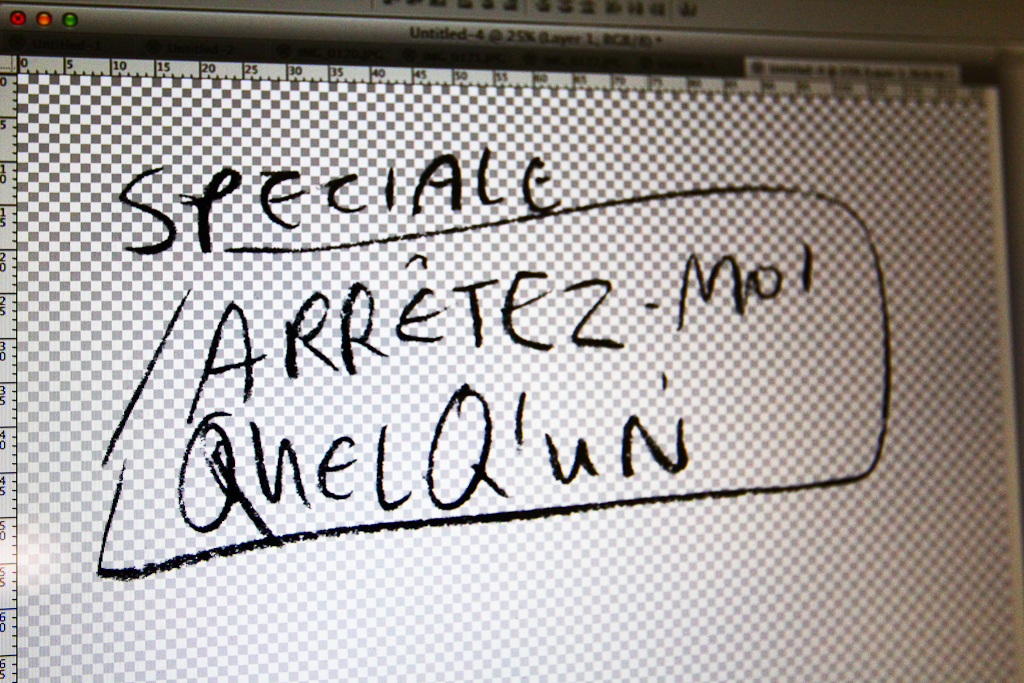
The adjusted image that we built the stencil file from — after live tracing in Illustrator.

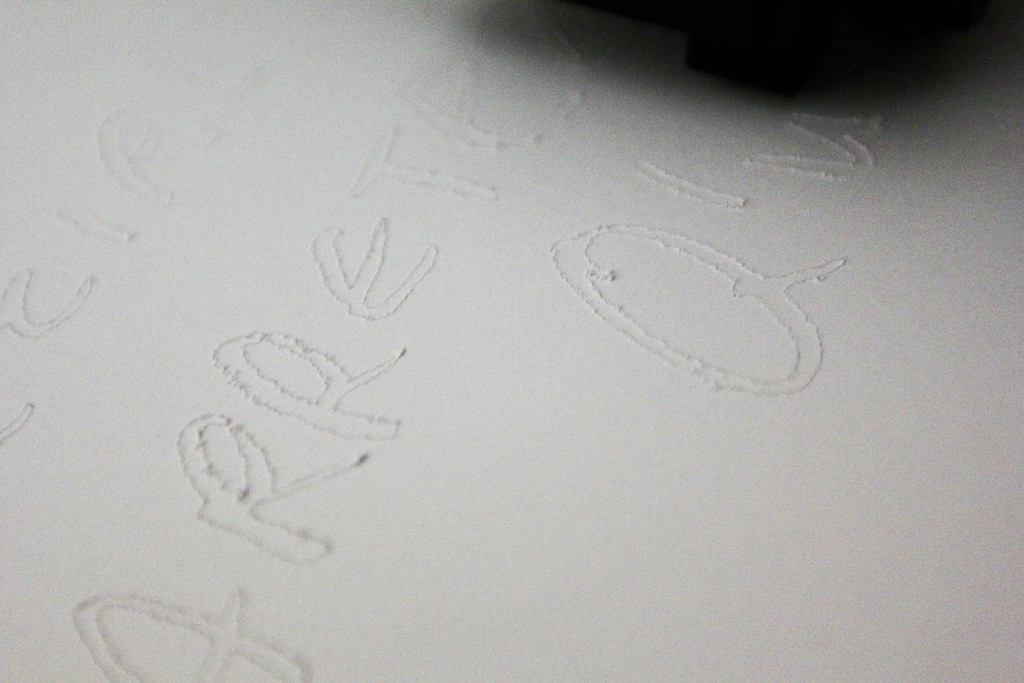
You can see the cutter did a pretty insanely great job at retaining the detail.

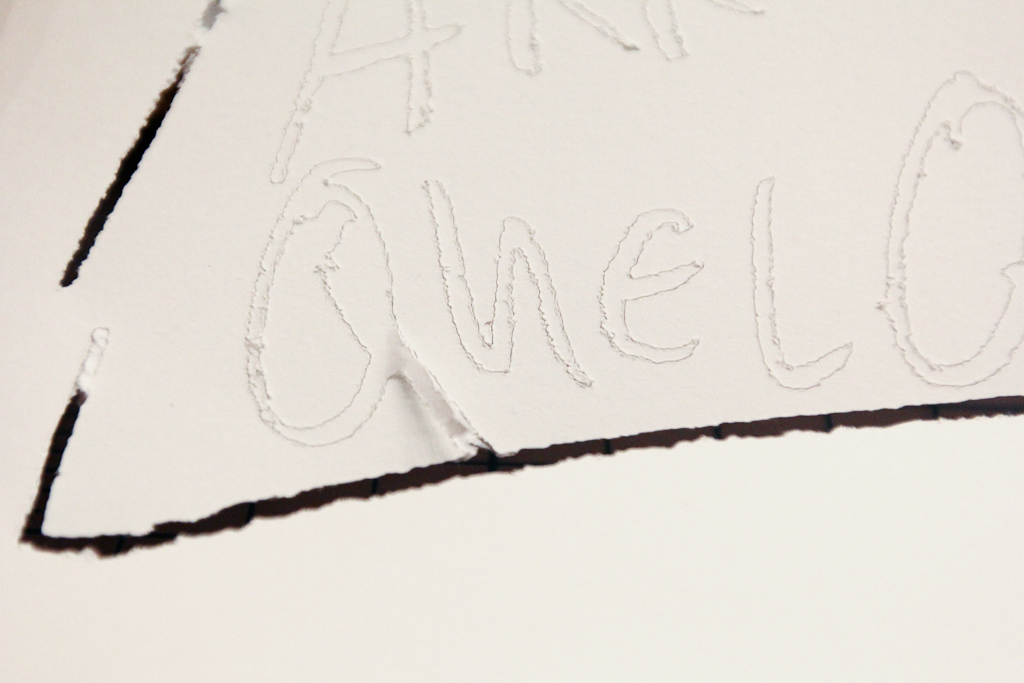
But, the blade didn’t quite make it through the paper entirely. So, we’ll have to make some adjustments on the down-force (I think that’s what it’s called) and try again. We used a similar process to cut the templates for our Letter Library from cardstock, but it’s entirely possible that the complexity of these cuts makes it more difficult for the blade to cut all the way through and maintain that depth of cut.

More later today and likely throughout the week …

Hello new friend, some initial tests with our new vinyl cutter

We recently acquired a Graphtec CE5000-60 cutter and we’re already dreaming up a whole bunch of new projects to put it to use. It cuts up to 24″ vinyl rolls (though I’ve also seen it score and maybe even cut cardstock) and with the Illustrator plugin, its incredibly easy. Above, a test with some gold vinyl.

It took only about 15 minutes to get it setup and running — there were some adjustments that needed to be made to in the offset to get the test triangle / square with the appropriate straight lines, but once that was setup and after I found the solution to the  HP-GL error 1 (change the command from HP-GL to GP-GL), I was able to send files from Illustrator just the same as you would send a file to print.

In these early tests, I’m just using some masking tape to transfer the vinyl.

It comes off pretty well — I was impressed with the quality and speed of the cut even with a cursive font like this.

I think they sell larger/wider rolls of masking-tape like material, but for now this works.

The maiden transfer onto a wall.

Easy transfer, just a little trouble with the bottom loop of the f.

So, a successful first test! In the past, we’ve worked with Printhouse for a lot of our one-off vinyl cuts, so if you’re looking for someone local we can highly recommend them. The things we’re going to be doing are just going to require so much volume that it was worth investing in one ourselves to do our own cuts. No details just yet, but I’m really looking forward to playing with this some more and I can’t wait to launch these new projects soon!