Soldering LEDs + Other Adventures in Electricity

All the materials to make this happen, LEDs, 9v power adapter, resistors, soldering iron, etc

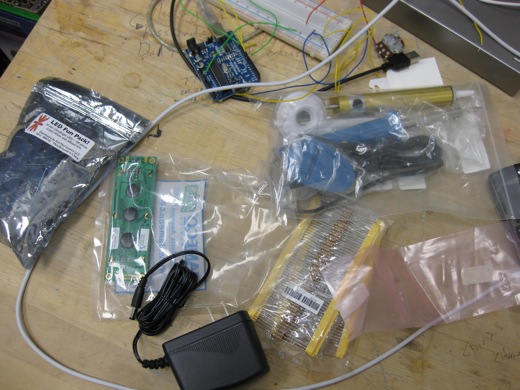
On Monday morning we set out all of the stuff that we figured we would need to start figuring out how to make an LED sign (+ some other things that aren’t really necessary for this project). We cut wires, soldered, used resistors, and mocked up a circuit on a breadboard and it was really, really fun. Lots of photos after the jump.

First step - cut off the end of the power adapter

First thing we had to do was secure our power source. I had ordered a 9v power adapter from Jameco, figuring we wouldn’t want to try to run this sign on a bunch of batteries, so we had to cut off the male end, leaving these two wires.

using the multimeter to make sure we were getting around 9v from the power adapter

We were a little nervous, but we put the two exposed wires into the multimeter and found we were getting pretty darn close to 9v.

We had some difficulty at first, figuring out how to make the breadboard work

Next, we tried to figure out how to use the breadboard. I had previously figured this out, but that was back in the summer, and I had forgotten which way things needed to be plugged in. You can see we have the 10mm LED, the 270ohm resistor and the leads from the power supply. The wiring in the above photo is incorrect though.

adjustments on the breadboard

We looked up some instructions, but something about them wasn’t registering with us, so we opted to just start experimenting some more. The wiring above was pretty close.

after realizing the LED was in the wrong way, positive and negative accidentally reversed, we fixed it and we had light

We realized that the LED was in the wrong way and that the resistor needed to be moved, then it worked!

we tested the resistor, all is well

We used the multimeter again and found we were getting 3.19v, which is pretty close to the rated forward voltage of 3.6v.

then we had to try two LEDs, and it worked!

Then we had to try 2 LEDs.

our first solder! resistor to LED

Then we decided to solder… soldering is really, really, really fun!

and then three LEDs

Then we had to try 3 LEDs, it was pretty awesome. 

then we started thinking about our first sign, we wanted to test to see how many LEDs might fit on the board

We also wanted to start doing some research about making an LED sign, so we printed some test text on 8.5 x 11 paper, layered a blank sheet on top and taped them together.

precision tool to start working on a prototype LED sign

Using an xacto knife with what was essentially a nail on the end of it, we started making holes for the LEDs. We wanted to see how legible the letters would be, depending on the number of LEDs we used and the spacing between them.

continuing with the LED sign prototype

Josh reasoned it would be best to work from the extreme points of each letter to get the spacing right.

continuing with prototyping

We tested a few of the letters, not the entire sign, as we would just have to take all the letters out eventually anyways. 

the completed prototype

We were pretty happy with how these turned out, and these letters used about what we were expecting—on average between 4 and 8 LEDs per letter.

measuring some plexiglass for an LED sign

Then we started thinking about making a real sign, settling on “Make Things Happen,” which would be mounted above my studio door. Though we meet in room 125, we weren’t sure about trying to mount a sign semi-permanently on cinder block. The width of the sign will fit perfectly above my door frame.

we're going to put this sign over top of my studio door

We’ll be continuing work on this at the next Office Hours, or next Monday, or both.

Tagged:

Related Posts: Fence Text + LED Soldering The LED Sign is Finished!!! Getting Things to Talk: Arduino + LCDs

Previous: « Next: »


5 Responses to “Soldering LEDs + Other Adventures in Electricity”

  1. darren says:

    i’m glad that we got a lot done tonight. sorry if i was getting tired near the end. i don’t feel like i helped out much today. i’ll have the photos and video ready for you on thursday.

    • Justin says:

      hey Darren, no need for apologies, it’s tough to get everyone’s hands on everything… especially since we were just really figuring out what we need to do. I think that next time, we can probably do more soldering. But again, thanks for coming, can’t wait to see the rest of the shots!

  2. darren says:

    i’d love to help solder next time too. i just wasn’t sure what order to solder so didn’t want to mess it up. i think the photos are ok. i just need to remember to not get you in the shots with your camera. : )

  3. [...] too short. Spending the majority of the time in Lebel’s wood shop, we started working on our LED sign, but still have a long ways to go with it. We cut plexiglass, drilled holes, and started [...]

  4. [...] took out my breadboard and revisited the original mock-up Michelle and I had done for the circuit, though somehow, we ended up confusing ourselves into [...]

Leave a Reply


Location

Windsor from Google Maps' perspective

Windsor, Ontario (South of Detroit)

SRSI: June 11 to July 11

The Storefront Residencies for Social Innovation invites the radical re-imagining of the possibilities in occupying a vacant storefront in the heart of Windsor for one month.

See the entire schedule here!!!

Mailing List


Activity

No public Twitter messages.

Follow us on Twitter

Conversations

  • Justin: I really like the distinction you pointed out between play and help. Looks like an amazingly fun time and all the better that you...
  • Rosina: yes. talk about this tomorrow/today?
  • Justin: Yeah, I think it could be very cool. You’re thinking about that lenticular rabbit you on posted on a while back as a...
  • Rosina: Serious? I would be down for it!
  • Justin: Rosina, awesome idea! The foot traffic there in both directions would really lend itself to this. Let’s do it.
  • Rosina: you know, looking at the stairs i thought a lenticular type thing would be kind of cool to see. Perhaps a two-sided message of...
  • darren: I was able to go for my usual ride to the end of Russell in the west end, thanks to the humidity finally going down a bit....
  • leesa: fantastico! i miss srsi already. congrats everyone.

Archives

Tags

3D 100 ways abandoned activism advertisements air airport algorithm Ambassador Bridge analog annotate architecture arduino art artist Artspace automobile awesome baking balloons banner banners battery BCL Bench bicycle bike bikes billboard billboards bio Blog book border brainstorm buildings bus Canada casino cellphone chalk Chattanooga cities city citynoise code collaboration collaborative collective community computer computers conference Conflux construction consultancy context costume crafts create here cross-border communication crowd-sourcing data database demo design Detroit development DIY documentary documentation downtown drawing driving ecohouse economy EC Row editing electricity electronics energy environment eric boucher event exhibition exploring extended field trip fake fashion fence fieldtrip fire firefox flagging tape font free friends gallery gambling game garbage garden gardening geography google google earth google maps graffiti grants grass green Green Corridor guerilla hack Halloween hardware history house how to HQ ice ideas image imagination Indian Road inflatable infrastructure install installation inter-city interactive internet intervention interventions interview kids Kitchener knitting LCD Lebel LED letters light lights list lists machine magnetic magnets make mapping maps materials math message michelles Michigan micro-residency mind map moss movie music nature neighbourhood news newspaper newspapers New York new york city night office hours open source opportunity paint painting paper paperwork parade park parking garage parking ticket participation party pedagogy performance perspective Peterborough photographs photography PHP pixel planning plant planters plants plastic bags pollution Portland postcards post office presentation project projection projector projects proposal psychogeography public public art public domain public realm public space pulp radio Rain reading reblog recycle remote research residency resistors reuse ribbons river roof rope Sandwich Save the City school screening sculpture sculptures security seed bombs seeds sign signage snow social practice software soldering sound Soundart space spray paint SRSI stencil stencils stickers storefront story strategic plan street street art street art submissions suburb summer surveillance sustainability sweaters tags talk tape tea technology test tetris text Text In-Transit time-lapse tools Toronto transit transmit travel tree trees tshirts tv Twitter university urban video visualization walk walking wall water Waterloo website wheat paste window Windsor wireless workshop writing youth youtube

Our Recent Research

Research Description

Broken City Lab is an interdisciplinary creative research group that tactically disrupts and engages the city, its communities, and its infrastructures to reimagine the potential for action in a collapsing post-industrial city.

Save the City

Broken City Lab: Save the City
5 months of community events to imagine how to save this city.

Subscribe

Broken City Lab RSS icon Blog RSS

Broken City Lab RSS icon Comments RSS

Events

The Storefront Residencies for Social Innovation: Launching June 11, 2010 June 11 to July 11, 2010

How to Save a City May 21, 2010 - 7pm

Open Engagement, Group Work: The Collective Impetus May 14-17, 2010

Things Worth Saving April 11 & 27th, 2010

Creative Cities Summit: Using Art to Change Cities in Lexington, Kentucky Apr 7-9, 2010

» More Events...

Cross-Border Communication

Cross-Border Communication: We're In This Together
Cross-Border Communication is an interventionist performance series based on the desperate need to communicate with Detroit from Windsor.

Most Read Posts

Contact

info@brokencitylab.org

Bookmarks

What We're Reading

Links

Meta